Windows 10 has come to users, but after Windows 10 installation is complete, the Update feature is still there. In addition, on Windows 10, Microsoft no longer integrates the option to turn off the update completely but the process of updating (updating) takes place automatically, not informing the user.
For most users, Windows Update will slow down the system, may cause incompatible errors, when needing to turn off the computer, wait for Windows to update very long and annoy ... and the following article of Administration The network will guide you how to turn off the automatic update feature on Windows 10! Because Windows 10 is constantly updated, if way 1 is not possible, try 2 ways, 3 ways ... okay, I test the first time, the first way is okay, then update, I have to use the combination of ways 1 and 2
1. Turn off Windows 10 update using Group Policy Editor
To turn off auto-update on Windows 10, follow the steps below:
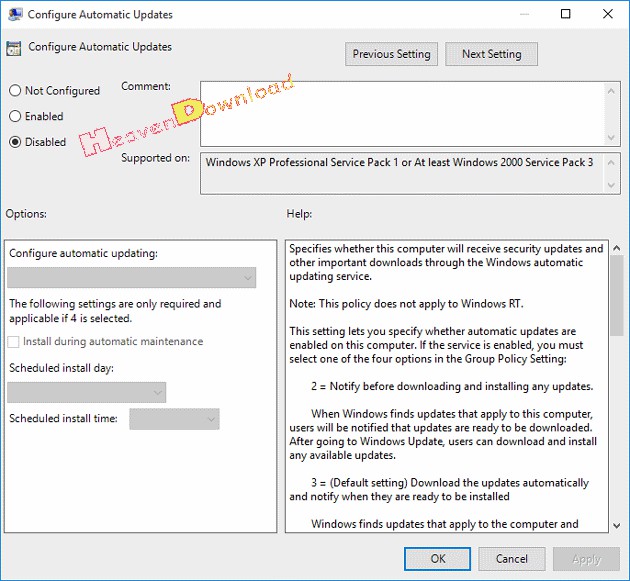
- Step 1: Open Group Policy Editor, press Windows + R key to open the Run command window, then enter gpedit.msc into it and press Enter.
- Step 2: On the Group Policy Editor window you navigate by key: Computer Configuration => Administrative Templates => Windows Components => Windows Update
- Step 3: Find the Configure Automatic Update, double-click it and select Disabled, then proceed to save and change it.
2. Turn off updates on Win 10 with services.msc
If way 1 still hasn't completely blocked updates on Windows 10, try combining this:
Press Windows + R to open run> type services.msc> press Enter or go through the path:
Control Panel\All Control Panel Items\Administrative Tools
Go to the Windows Update section (scroll down to the end), double-click it to bring up the window as follows:
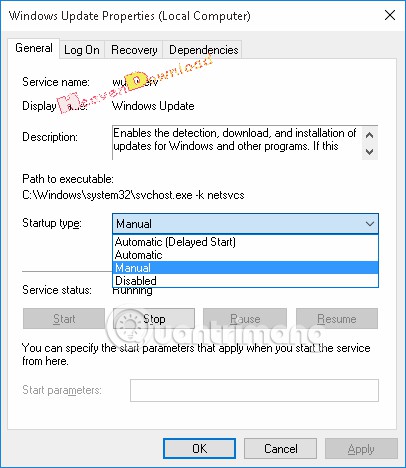
- At the General Startup type> tab, click the arrow in the box and select Disabled.
- OK to save changes, restart your computer and check Windows Update.
Note: If you do it this way, Windows Defender will not be able to Update anymore, it will be quite dangerous if your computer does not install antivirus software for Windows yet. If you just want to delay updating Windows 10, wait until the update is complete, then in the Startup Type, select Automatic (Delayed Start). At that time, Windows 10 will allow postponing the update for 3 days, every 3 days after you choose to delay.
3. Block Windows 10 updates according to instructions from Microsoft
Enter regedit in the search box, press Enter to open the registry window.
Copy and paste the following link into the address bar just below the menu
HKEY_LOCAL_MACHINE\Software\Policies\Microsoft\Windows\WindowsUpdate\AU
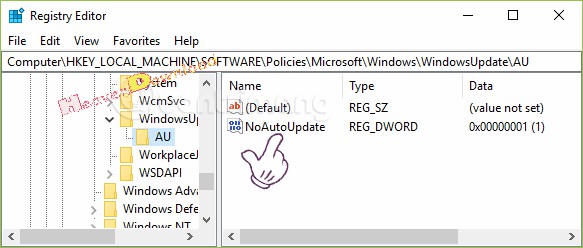
Double-click NoAutoUpdate, in Value data, enter 1 and click OK as shown:

After completing the value of NoAutoUpdate will now be 0x00000001 (1). If you want to let Windows 10 update automatically again, you change the Value data value in the previous step to 0.
4. Turn off Windows Update on Windows 10 using Administrative Tools
At the Desktop interface, press the window key and type update:
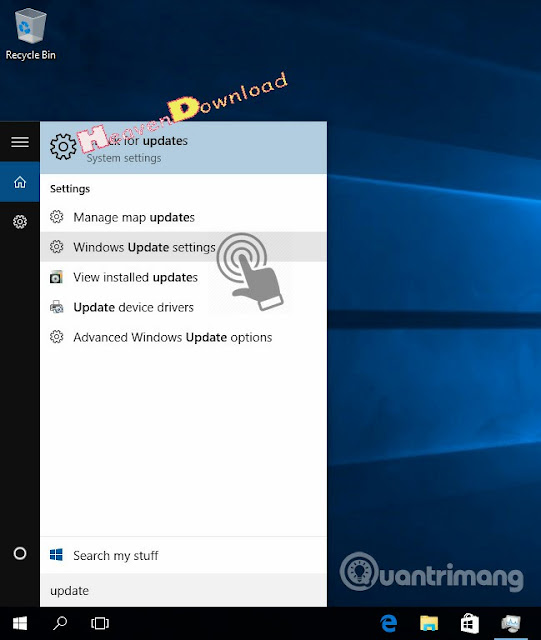
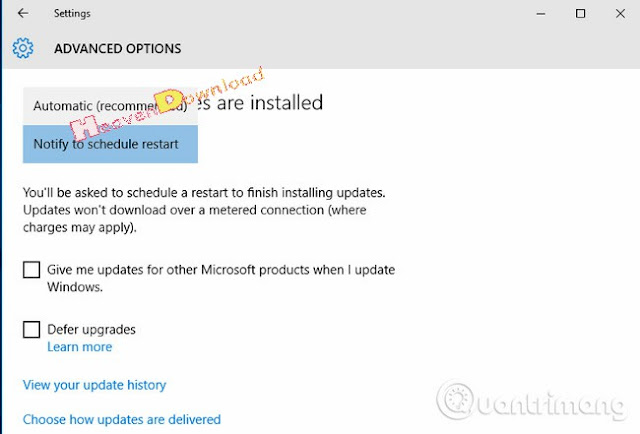
There are many options here, click Windows Update settings or Advanced Windows Update options. The next window displays, you select the mode Notify to schedule restart instead of Automatic, remove the check box in the 2 boxes below:
Another new feature in Windows 10 is the system that allows updating via peer computers (p2p). Understanding this is like this: when updating, a computer will be considered a "host", while other peer machines will update through that "host". This will help users save bandwidth, and updating will be faster than downloading directly from the Internet. And to turn off this type of update, you click on the link Choose how updates are delivered:
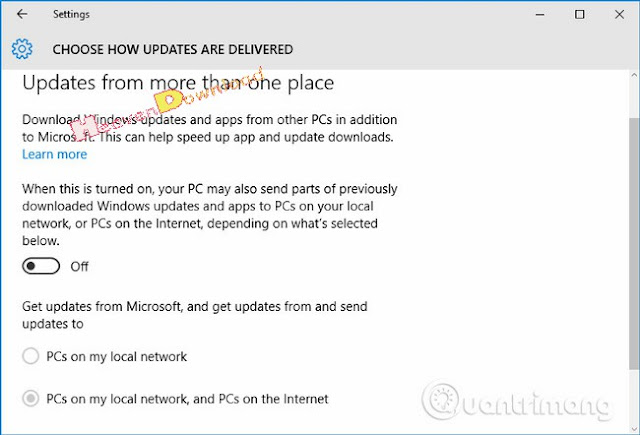
Turn On mode to Off.
5. Set up WiFi connection in Metered connection mode to suspend automatic updates on Windows 10
If you want to disable Windows 10 automatically, you can take advantage of the Metered Connection feature to delay automatic updates.
Note: This option only works with WiFi because Windows 10 cannot consider any other Ethernet type to Metered Connection
If your Internet connection has limited data, this feature can help a lot because you can install them at the right time.
To enable the Set as metered connection option, follow these steps:
1. On a Windows 10 computer, open the Start Menu.
2. Go to Settings.
3. When the Settings window opens, click Network & Internet.
4. Click Wi-Fi in the left pane.
5. Now, click Manage known networks.
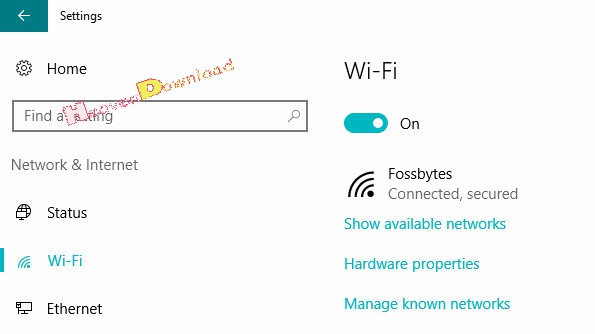
6. Click on the wireless connection name.
7. Click on the Properties button. Now scroll down to find the Metered Connections title.
8. Then turn on the Set button as the metered connection.
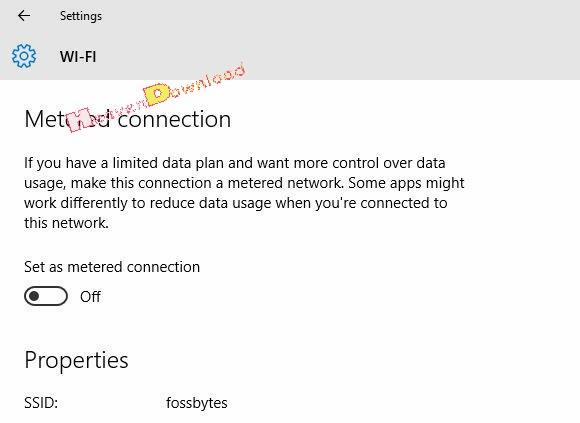
This way, you can pause Windows 10 updates for a while in case you run out of monthly usage.
6. Windows 10 Home patch allows you to turn off automatic application updates
This option only works for application updates. If you want to continue to receive security updates and fix Windows 10 errors, you can use this method.
In Cumulative Update 5, Microsoft has enabled automatic application updates to be turned off. If you don't have this patch, go to Settings> Update & Security> Windows Update and be sure to get the latest Windows patch.
Then, open the Store app and click the Profile button in the toolbar. Here you can turn off automatic app updates to disable automatic updates of Windows 10.
7. Turn off specific Windows 10 updates
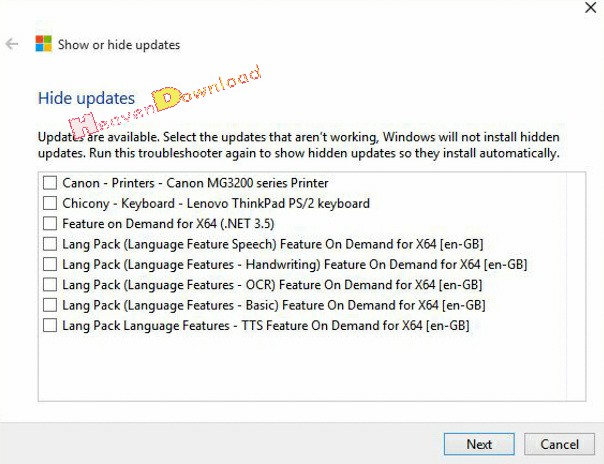
On the Windows website there is a "show or hide updates" tool that allows users to disable or hide specific Windows 10 updates. You just need to download this tool and install it. Follow the instructions and disable problematic updates.
